George timmermans
  • About Me
    • Resume
    • Press releases
  • Blog
  • Projects
    • Long Range WiFi Link
    • Embedded Systems >
      • Photo Booth
      • Classroom VU meter
      • USB Media Controller
      • Weather Station
      • Arduino Swimming Pool Controller
      • GRBL Android Controller
      • Arduino Serial Driver
      • Arduino Multitasking
      • 8x8x8 LED Cube
      • Analog -> Digital Geiger Counter
    • 3D Printing >
      • Simplify3d Configuration
      • 3D print repairs
    • Home Brewing >
      • Mead Recipes >
        • Cinnamon Mead
        • Sweet Chili Mead
        • Lemon & Ginger Mead
        • Mead Liqueur
        • Honey Beer
      • Glühwein (Spiced Wine)
      • Limoncello
    • House
    • Toolmaking
    • Laser Cutting
  • Weather Cam
  • Contact

Returning to 3D printing

1/8/2019

0 Comments

 
The 3D printer has been collecting dust for over a year and the last few months it has been living in its storage box. One of the reasons I have not used it much is because it hasn't been printing well. It hasn't been printing well because I did not properly assemble the extruder assembly when I upgraded several parts. 

Now I had time and motivation to go and resolve this. Time for a game plan. I was fairly confident all the issues where in the extruder assembly. So the plan was to carefully take it apart. Clean all the parts. And assemble it in very specific order so it the extruder is assembled correctly.

With the extruder on the Makerbot replicator and possibly other 3D printers on the market you have to be very careful with the disassembly of the extruder head. Some parts you can only loosen when the extruder is warm/hot. For example the nozzle might break off if you try and undo it while cold. This will be a challenge to then repair. So knowing this in advance and trying to mitigate these possible problems is great. 

I won't bore you with the details on how to take the extruder apart. The Makerbot replicator extruder has a complex order in the way it has to be disassembled. During disassembly I discovered little things that I could improve during assembly to improve reliability. And possibly increase the longevity of the extruder.

Because I had the extruder apart I took the opportunity to replace the ceramic insulation on the heater block before assembly.

​Assembling the extruder the right way! In a way it's very easy. You just need to know the trick. Start with the nozzle and the heater block and then add all extruder parts where the filament goes through mate with each other. 
  1. Nozzle
  2. Extruder block
  3. Thermal barrier tube
  4. Thermal barrier tube nut - 1
  5. Carriage
  6. Thermal barrier tube nut - 2
After everything was assembled before attempting the first 3D Print there where a couple of check to do. Load filament through it for a while to verify it extrudes alright. And level the build platform. 

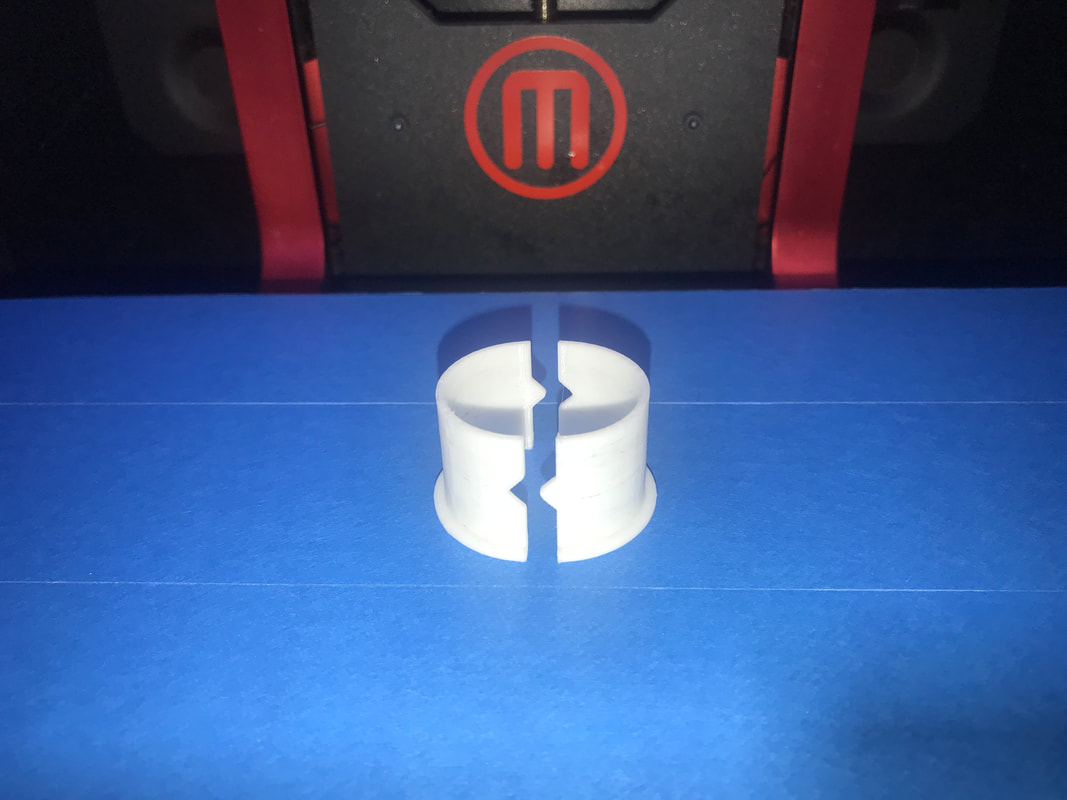
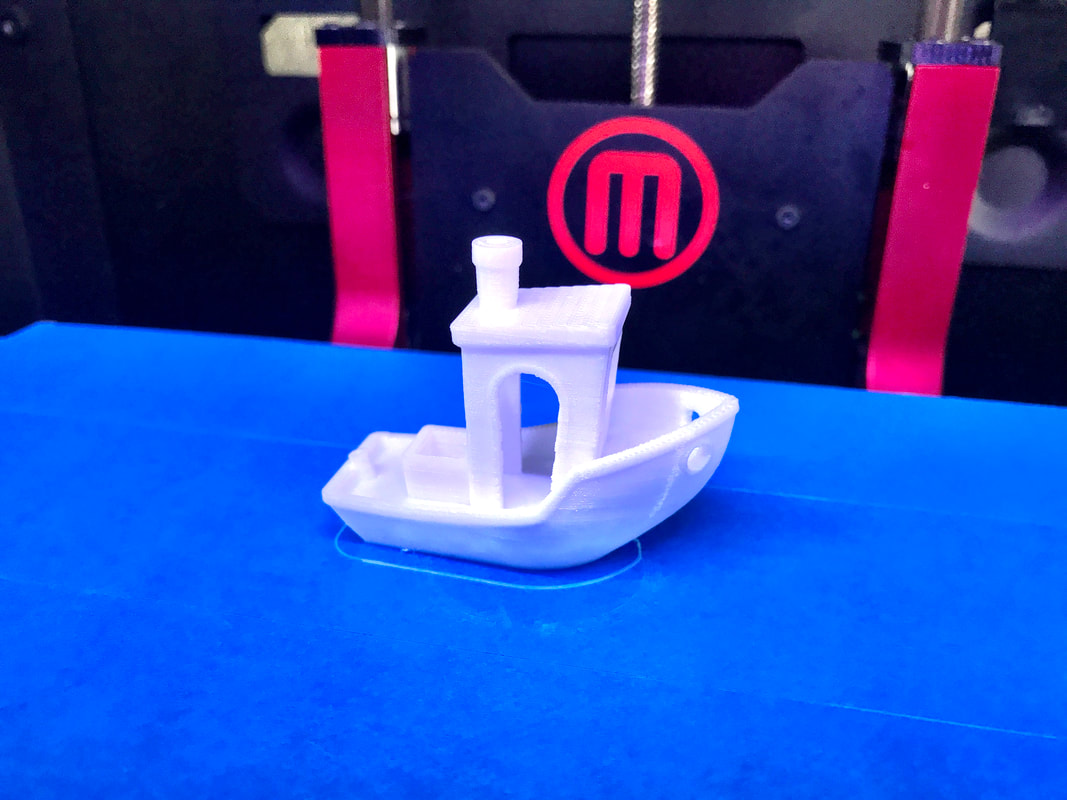
​I quickly whipped up something I wanted to print and used it to test the printer. It printer beautifully on the first print. And off course you must then print a Benchy boat to see how it performs. Which I am very impressed with too. The parts below were printed in white PLA. The slice the first part I quickly used Makerbot print. The slicer made by Makerbot for Makerbots. Benchy boat was sliced using the latest version of Simplify3d.

Expect more updates around 3D printing in the near future. And I will be adding a lot more content to my dedicated 3D printing page.
0 Comments

Your comment will be posted after it is approved.


Leave a Reply.

    Author

    George Timmermans, Research Toolmaker, Software Engineer and Tinkerer

    View my profile on LinkedIn

    Archives

    January 2021
    November 2020
    July 2020
    May 2020
    November 2019
    August 2019
    January 2019
    October 2018
    January 2018
    November 2017
    October 2017
    August 2017
    June 2017
    May 2017
    April 2017
    March 2017
    January 2017
    December 2016
    November 2016
    October 2016
    August 2016
    July 2016
    June 2016
    May 2016
    April 2016
    March 2016
    December 2015
    November 2015
    October 2015
    September 2015
    August 2015

    Categories

    All
    3d Printing
    Photobooth
    Wisp

    RSS Feed

Proudly powered by Weebly
  • About Me
    • Resume
    • Press releases
  • Blog
  • Projects
    • Long Range WiFi Link
    • Embedded Systems >
      • Photo Booth
      • Classroom VU meter
      • USB Media Controller
      • Weather Station
      • Arduino Swimming Pool Controller
      • GRBL Android Controller
      • Arduino Serial Driver
      • Arduino Multitasking
      • 8x8x8 LED Cube
      • Analog -> Digital Geiger Counter
    • 3D Printing >
      • Simplify3d Configuration
      • 3D print repairs
    • Home Brewing >
      • Mead Recipes >
        • Cinnamon Mead
        • Sweet Chili Mead
        • Lemon & Ginger Mead
        • Mead Liqueur
        • Honey Beer
      • Glühwein (Spiced Wine)
      • Limoncello
    • House
    • Toolmaking
    • Laser Cutting
  • Weather Cam
  • Contact