|
For years I had a homebrew ambilight setup for my 24' full hd monitor based on Adafruits version of ambilight called adalight. These days you can buy a simple kit of aliexpress so you don't really have to do any soldering and programming of an Arduino. Not that I have any problem doing that but why bother? Here is a photo on how I installed it on a 32" monitor. I ended up using a total of 104 led pixels. 16 on the bottom, 24 either side and 40 on the top. 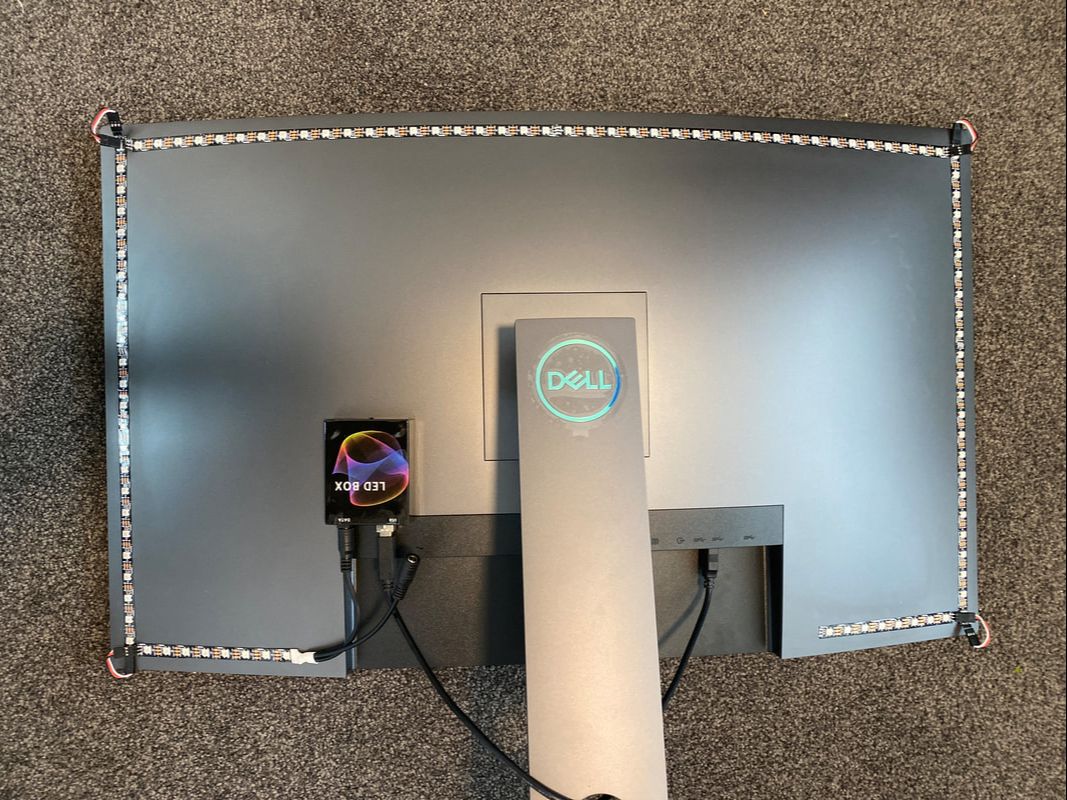 I connected the corners by soldering on header pins and connecting them with 3-pin JR connectors. I recommend cleaning the surface with methylated spirits before sticking down the LEDs. The orientation of the LEDs can be changed in software but by default it would follow an anti-clockwise direction if you where sitting in front of the monitor.  Once everything was hooked up I ended up using Lightpack to drive the LEDs. I used the custom config to make the software match my LED layout.  While doing some research I found a great article around calibrating the LEDs. I recommend reading it: Calibrating Ambilight Color in Prismatik and it is what I used to adjust some of my settings. The camera doesn't capture the colours the way I see them. In person it looks a lot more accurate. 
0 Comments
Your comment will be posted after it is approved.
Leave a Reply. |
AuthorGeorge Timmermans, Research Toolmaker, Software Engineer and Tinkerer 
Archives
March 2024
Categories |
 RSS Feed